

Cable Box Features
Your HTC video has a lot of great features. Below are answers to your frequently asked questions.
Q: What is the Quick Menu?
Gives quick access to the most used options.
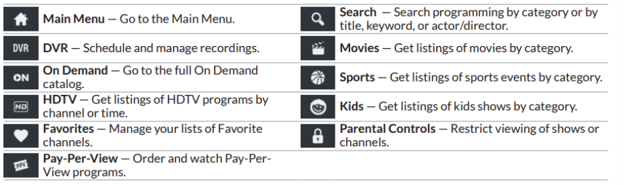
- To access the Quick Menu, press Menu on the remote control while on any screen.
- Use the
 buttons on the remote to move through the icons.
 - Press OK/Select to make a selection.
- To move back at any point, press the Last button on the remote control.
- To return to the program that is airing, press the Exit button.
- Note: On Demand and Pay-Per-View are no longer available
 buttons on the remote to move through the icons.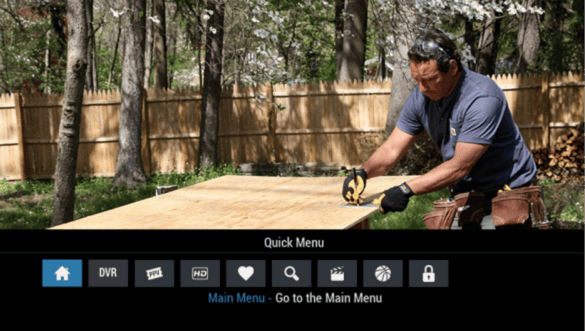
Q: What is the Main Menu?
From the Quick Menu, press the MENU button on the remote again to access the Main Menu.
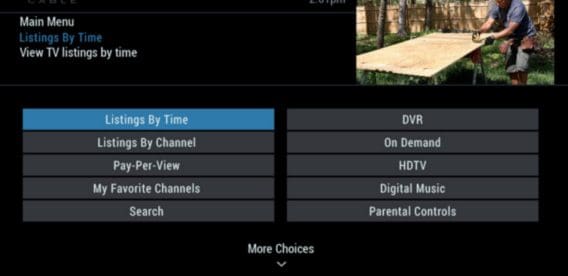
- Use the arrow keys to move through the options.
- Press OK/Select to make a selection.
- To go back at any point, press the Last button.
- To return to the program that is airing, press the Exit button.

Q: How do I access the Main Program Guide?
You have the ability to browse broadcasts by time and channels.
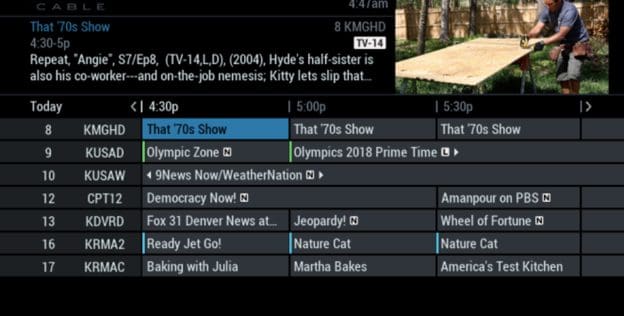
- Get started by pressing the GUIDE button on the remote control.
- The display will be a 90-minute view of program listings with up to 7 channels per screen.
- The programming information for the next 2 weeks should be available on the guide.
Q: How do I perform a Search?
This feature makes it easy to search by title or keyword, and to filter or sort programs by channel or theme.
To get to the Search option
- Press MENU on the remote control
- Select the icon
 icon
iconTo Search by category
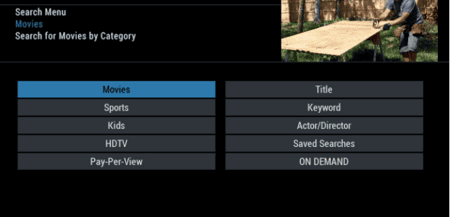
- Select a category to search
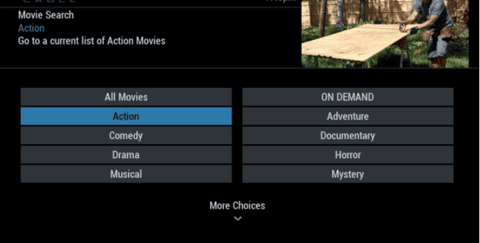
- Select a genre to search

- Look through the list for a show
- If there are seven shows on the screen, arrow down to see the next page
- Arrow right to see upcoming shows
- Select a show
To search by title or keyword – use one of the following methods:
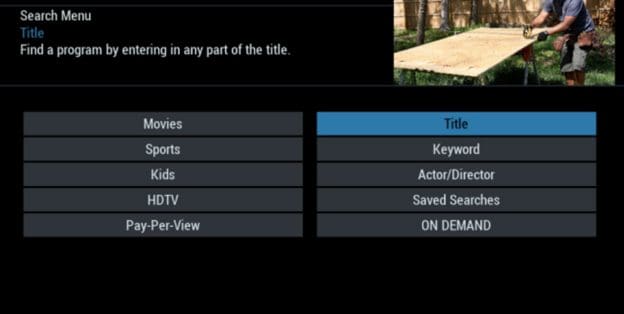
Method 1
- Press Menu once
- select the icon from the Quick Menu
Method 2
- Press Menu twice
- Select Search from the Main Menu
- Select the search to be executed from the options offered:
- Title
- Keyword
- Actor/Director
- Enter Search Criteria
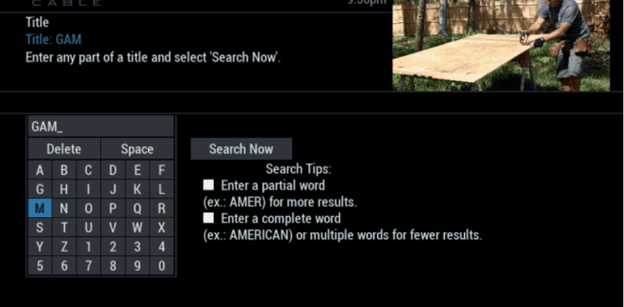
- Use the arrow keys to spell the search text
- Select Delete to backspace
- Select Space to add a space
- To search, select Search Now
- If search results come up as they are being entered, scroll through and select a show
Q: How do I save my Favorite Channels?
Allows lists of favorite channels to be created and viewed.
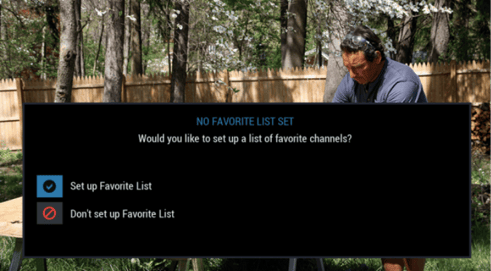
To set up the first favorites list
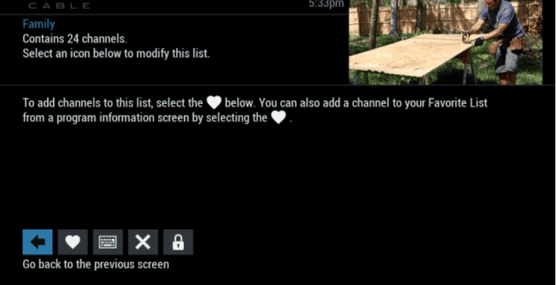
- Press the MENU button on the remote control
- Select the icon.
- Select the icon to set up the list.
- To add channels, select the icon at the bottom of the screen.
- Use the arrow keys to re-sort the list by channel name or number.
- Use the arrow keys and the icon to move to a favorite channel.
- To add or delete a favorite channel to the list, press OK/Select on a channel.
- To confirm the selection, select the icon.
 icon.
icon.  icon to set up the list.
  icon to move to a favorite channel.
 To add another favorites list
- Press MENU twice to go to the Main Menu.
- Select Setup.
- Select Favorite Lists Setup.
- Select the icon to add another list. There is a limit of 4 lists.
 icon to add another list. There is a limit of 4 lists.
 To modify channels in an existing favorites list
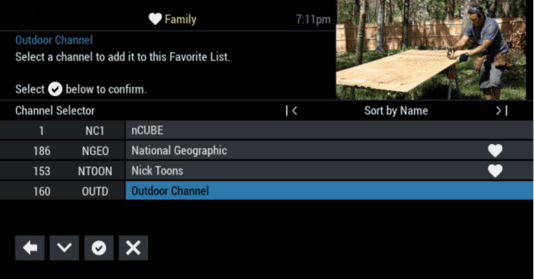
- Press MENU twice to go to the Main Menu.
- Select Setup.
- Select Favorite Lists Setup.
- Select the list to be modified.
- To add or delete channels from the list, select the icon at the bottom of the screen.
- Use the arrow keys to re-sort the list by channel name or number.
- Use the arrow keys and the icon to move to a favorite channel.
- To add or delete a favorite channel to the list, press OK/Select on a channel.
- To confirm the selection, select the icon.
To rename an existing favorites list
- Press MENU twice to go to the Main Menu.
- Select Setup.
- Select Favorite Lists Setup.
- Select the list to be renamed.
- To rename the list, select the icon.
- Using the arrow keys, spell the name for the list by selecting each letter in turn.
- To insert a space between words, select Sp (Space) on the keyboard.
- To backspace and delete a character, select .
- When finished select Save.
- To cancel instead, press the Last key on the remote.
 icon.
icon.  .
. To delete an existing favorites list
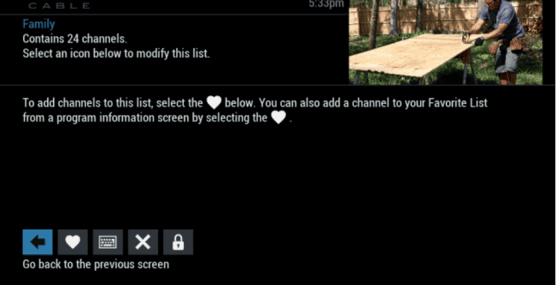
- Press MENU twice to go to the Main Menu.
- Select Setup.
- Select Favorite Lists Setup.
- Select the list to be deleted.
- To delete the list, select the icon.
 icon.
icon. To lock an existing favorites list
- Press MENU twice to go to the Main Menu.
- Select Setup.
- Select Favorite Lists Setup.
- Select the list to be locked.
- To lock the list and require a PIN to modify, select the icon.
 icon.
icon. To view the guide for existing favorites lists. Note: There are two methods to get to Favorites.
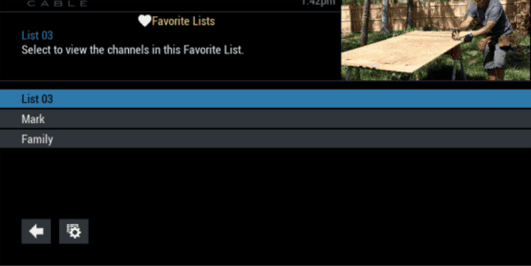
Method 1:
- Use the Fav key on the remote control.
- Press the Guide key to bring up the program guide.
- Press Fav.
- Continue to press Fav until the desired list is shown.
Method 2:
- Press the Menu key on the remote control
- Select the icon.
- Press Menu.
- Select the icon.
- Select the saved list.
Q: How do I set up parental controls?
With parental controls, add restrictions on the viewing or purchase of TV programs and movies and recorded shows, based on preferences.
These controls can also prevent titles of adult content from being displayed on-screen in the program guide and elsewhere.
Parental Controls enable locks by title, channel, and TV and movie parental ratings.
To set a parental control lock
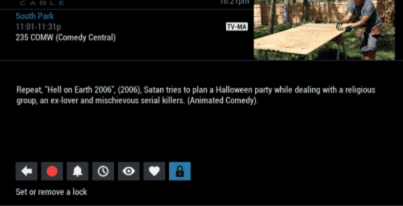
- Press the MENU button on the remote control.
- Select the icon.
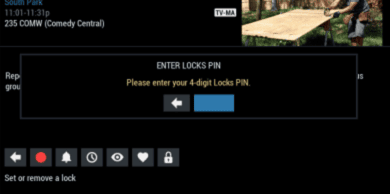
- Enter the 4-digit number to be the new Locks PIN.
- The prompt will ask the number to be re-entered.
- The Locks PIN has been created at this point.
To add restrictions

- Press Menu twice to bring up the Main Menu.
- Select Parental Controls.
- Enter the Locks PIN.
To lock shows by Ratings, Content, Title, etc.

- From the Parental Controls Menu, select an option
- Use the arrow keys to move to a rating to lock or unlock.
- Select the option to lock.
- The lock icon indicates a locked rating.
- Press the Last key to return to the menu.
Q: How do I turn on Closed Captioning?
To access closed captioning setup
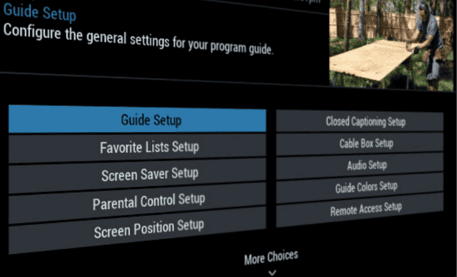
- Press MENU twice to go to the Main Menu.
- Select Setup.
- Select Closed Captioning Setup.
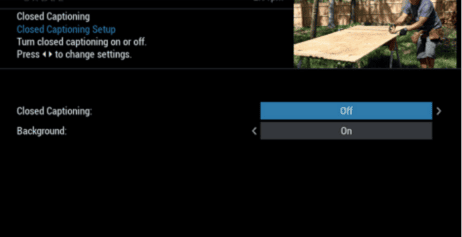
- Use the arrow keys to move to an option.
- Use the arrow keys to view and select a setting. The braces < > show which arrow keys can be used.
- Closed Captioning: Select On to enable closed captions for programs that provide them.
- Background: Select On to give the text a background. See the sample captions on the following screens.
Closed Caption with Background

Closed Caption without Background